How we made a pizza oven during lockdown / Un four à pizza fait maison
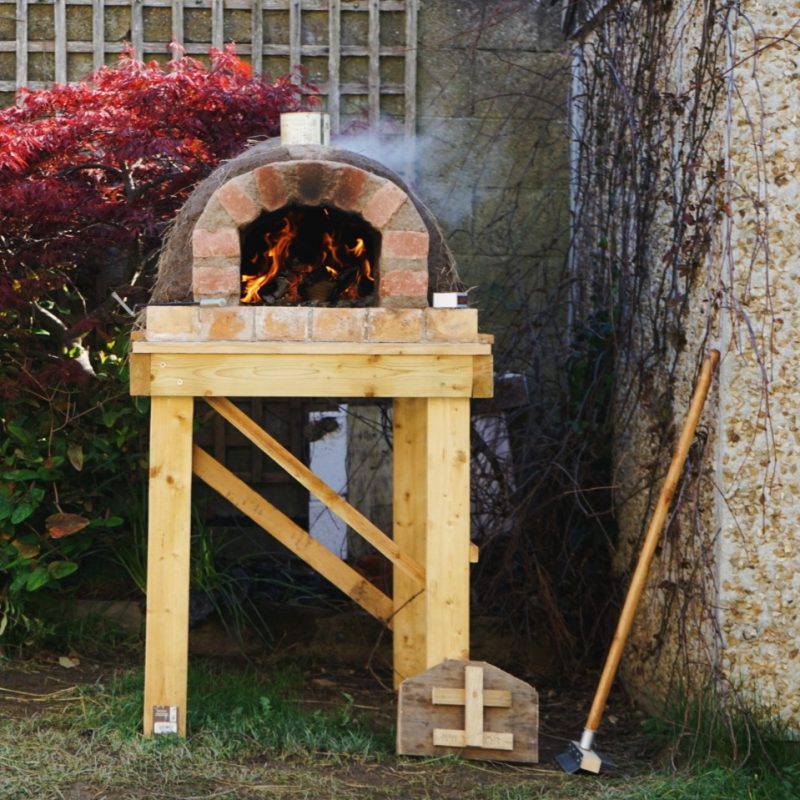
So here it is – the clay oven we built in our back garden during the coronavirus lockdown. The acorns nicknamed it Hedgehog, because of the strands of hay sticking out of the outer layer.
It all started with a book, Outdoor Cooking by Gill Meller (affiliate link), which Brian got for Christmas. This lovely River Cottage handbook first inspired our winter feast on the beach last December. But soon Brian got stuck into one particular chapter: The Wood Oven.
You can build your own wood oven from scratch. (…) It is surprisingly achievable. You don’t need any experience in bricklaying or building, and it’s a job you can complete solo.
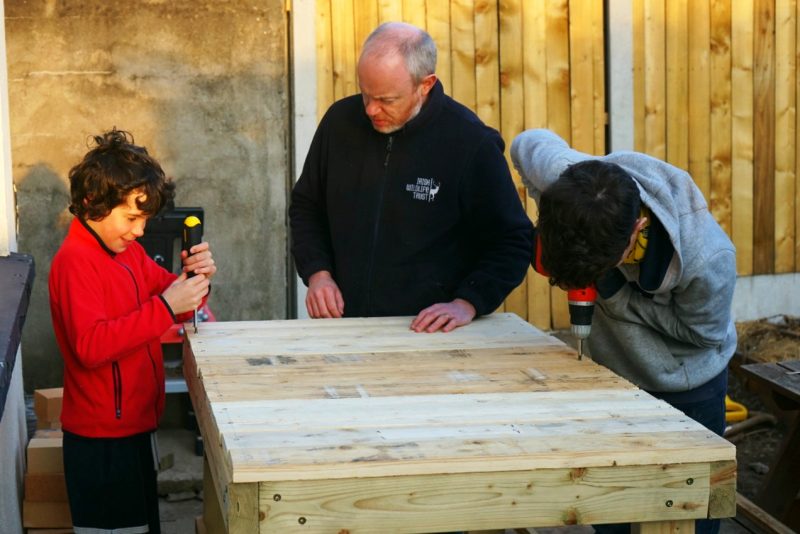
Building a pizza oven is indeed pretty straightforward… on paper! Little did we know that it would take so long to see it through. Much like for a painting job, preparation is lengthy but crucial, starting with the plinth the oven would be resting on.
Building a plinth for the pizza oven
After many hours spent considering various designs and playing with measurements, it was already February by the time Brian bought the materials and built a sturdy plinth, with the acorns’ help, of course.
Le voilà enfin : le four à pizza que nous avons construit dans le jardin pendant le confinement. Les graines de chêne l’ont surnommé “Hérisson”, à cause des brins de foin qui dépassent la couche finale de torchis.
L’aventure a commencé par un livre, Outdoor Cooking de Gill Meller (lien partenaire), que Brian a reçu en cadeau de Noël. Ce même livre avait déjà inspiré notre festin d’hiver sur la plage, à la fin décembre. Mais Brian ne tarda pas à se plonger dans un chapitre spécifique : celui consacré au four à bois.
Il est possible de construire son propre four à bois. C’est même parfaitement réalisable. Aucune expérience en maçonnerie ou construction nécessaire, et c’est un project qu’on peut réaliser seul.
En effet, construire un four à pizza est plutôt simple… sur le papier. Nous n’avions pas anticipé que le projet prenne aussi longtemps. Comme pour des travaux de peinture, des préparatifs prolongés sont indispensables. A commencer par la fabrication d’un socle sur lequel le four reposerait.
Socle en bois
Au bout de maintes heures de réflexion et conception, Brian a opté pour un socle en bois de 120 x 80cm. Une fois tout le matériel acheté, c’était déjà la fin février. Bien évidemment, les graines de chêne lui ont donné un coup de main pour la fabrication.
On the weekend before Ireland went into full lockdown, Brian drove to a builder’s merchant in Dublin to collect an order of oven-building materials – fire bricks for the floor, a bucket of fire cement, bags of building sand and clay powder, 12 red bricks for the door arch, and various other bits and bobs.
Two days later, all hardware stores and builder’s yards were to close indefinitely. If other things were needed, we would have to find them around the house or in the garden shed!
A week later, Brian and the acorns laid a floor of fire bricks on top of the plinth. Once the fire cement was set, the plinth was moved, with great difficulty, to its permanent site beside the garden shed.
Le weekend précédant l’instauration du confinement total en Irlande, Brian s’est rendu dans un magasin de matériaux de construction à Dublin pour enlever une commande de briques réfractaires, sacs de sable et d’argile en poudre, un seau de ciment réfractaire, 12 briques rouges pour la porte du four, et autres articles variés.
Deux jours plus tqrd, tous les magasins de bricolage et matériaux fermaient jusqu’à nouvel ordre. S’il venait à nous manquer quelque chose, il faudrait improviser ou le trouver à la maison ou dans l’abri de jardin !
Une semaine plus tard, Brian et les graines de chêne posèrent un sol de briques réfractaires sur le socle en bois. Une fois le ciment sec, le socle fut transporté, non sans difficulté, sur son lieu de résidence permanent à côté de la remise.
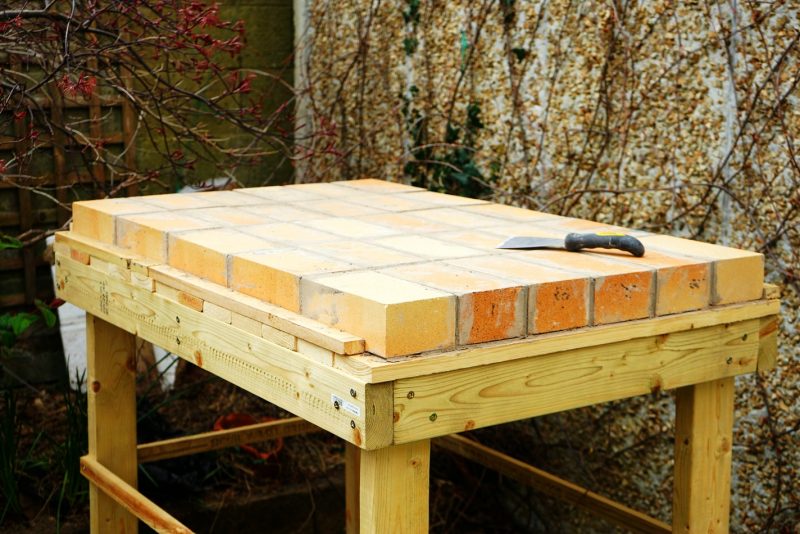
Layer of fire bricks, built with fire cement, on the wooden plinth /
Briques réfractaires posées avec du ciment réfractaire sur le socle en bois.
With the plinth completed, the building of the oven itself could begin.
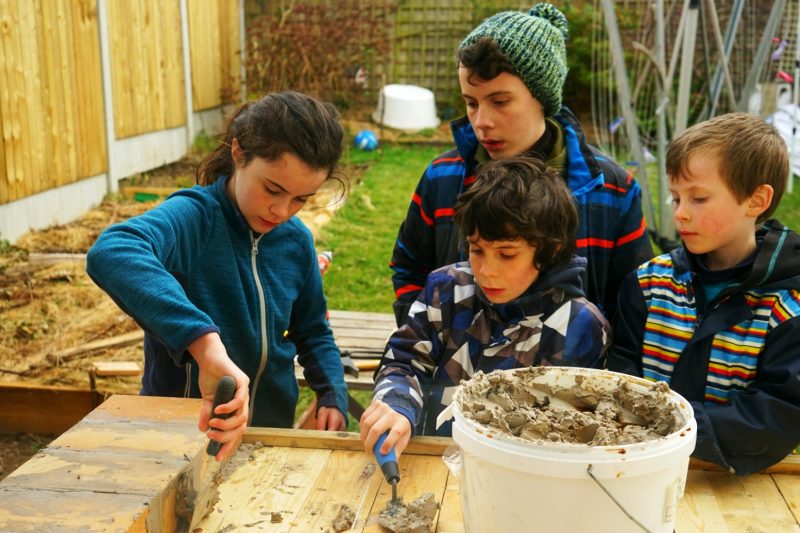
The next step was supposed to be the making of a “former” – a temporary sand dome which would give the oven its shape. The problem was, we didn’t have enough sand to make the dome and the clay + sand mix for the oven. So Brian improvised, making a former out of an empty cardboard box.
Building a pizza oven
The acorns happily stomped in a old baby bath to mix sand and clay into a usable building material. First it was too sandy, then it got too wet. Still unsure about the consistency of our cob, we started laying it around the cardboard former. We had reached the slanted part, when the damp cardboard collapsed under the weight of the clay.
Ensued a few frantic minutes of trying to mend it somehow, until it became obvious that we had to start all over again.
Back to the drawing board
Brian strengthened the plinth, which had become too wobbly for our peace of mind. He also bought online a pizza peel and wire brush.
Then, six days and several YouTube tutorials later, with some lessons learned and a new former, we got to work again.
The rest is history. Check out the video below!
Une fois le socle terminé et mis en place, la construction du four à proprement parler pouvait débuter.
Prochaine étape : la fabrication d’un dôme temporaire de sable mouillé qui donnerait sa forme au four à pizza. Le problème, c’est que nous n’avions pas suffisamment de sable pour créer ce gabarit et le mélange sable-argile pour le four lui-même. Brian improvisa alors en utilisant un carton vide aux dimensions requises.
Construction du four à pizza
Les graines de chêne foulèrent joyeusement sable et argile dans une ancienne baignoire en plastique, jusqu’à obtention d’un mélange utilisable. D’abord, il était trop sec et friable. Ensuite, il devint trop mouillé. Encore incertains quant à la consistence de notre torchis, nous avons commencé à l’appliquer autour du gabarit en carton. Nous avions atteint la partie pentue du dôme quand le carton humide s’effondra sous le poids de l’argile.
S’ensuivirent quelques minutes de tentatives désespérées pour réparer les dégâts. Mais il fallut bientôt se rendre à l’évidence : nous allions devoir tout recommencer.
Retour à la case départ
Brian commença par renforcer le socle, qui était devenu un peu trop chancelant à notre goût. La semaine suivante, il acheta en ligne une pelle à pizza et une brosse métallique à long manche.
Six jours et plusieurs tutoriels YouTube plus tard, nous nous sommes remis à l’œuvre, notre leçon apprise : cette fois, le gabarit consistait d’un carton rempli de bûches.
Le reste de l’aventure fait désormais partie des annales de notre famille, grâce à la vidéo ci-dessous (ou au-dessus pour la version longue).
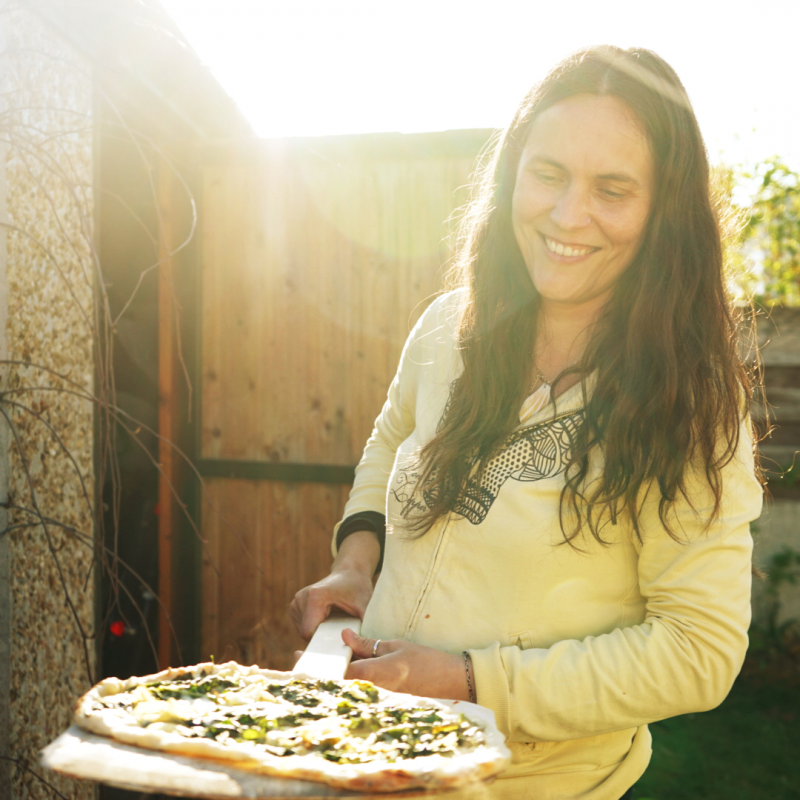
Pizza party in the garden
We got a bit ahead of ourselves. Our brand new, homemade pizza oven was only 24 hours old and still damp, so the plan was to light a small fire inside it to speed up the drying.
Pizza party dans le jardin
Nous avons pris les devants. Notre four à bois, terminé depuis 24 heures à peine, était loin d’être sec. Aussi le plan était-il d’allumer un feu à l’intérieur pour accélérer le séchage.

Firing the pizza oven speeds up the drying. For the chimney, we used an empty pot of paint /
Faire chauffer le four accélère le séchage. La cheminée est faite d’un pot vide de peinture.
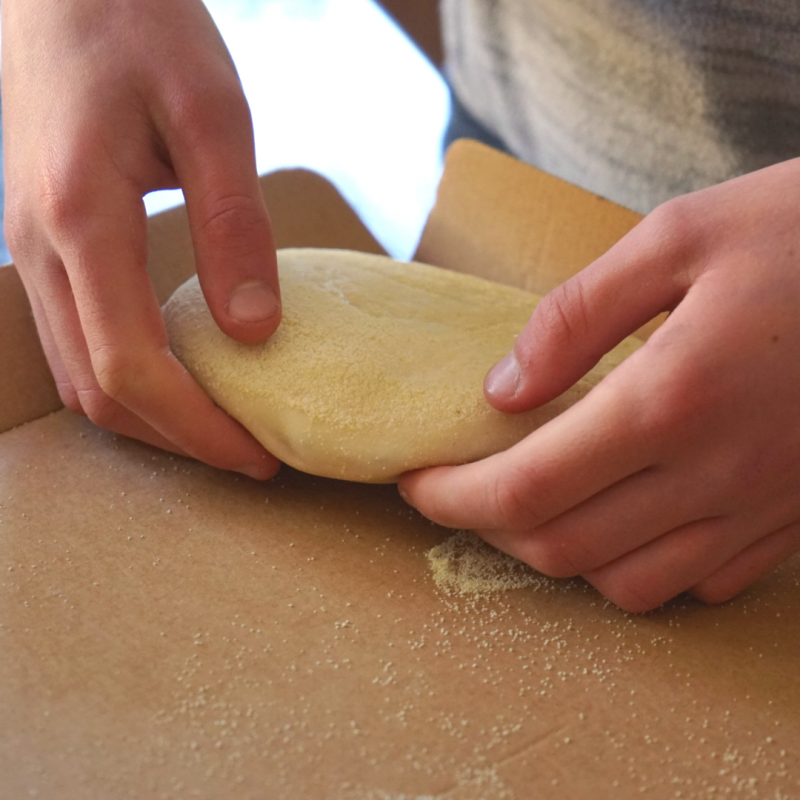
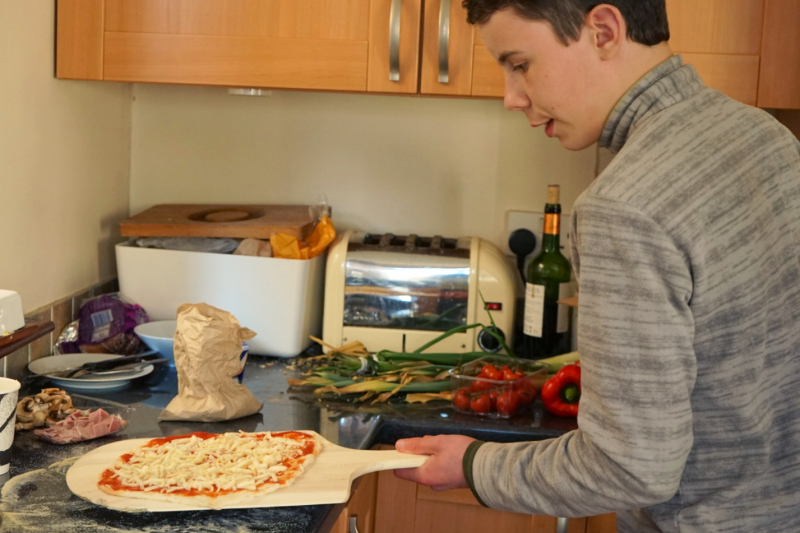
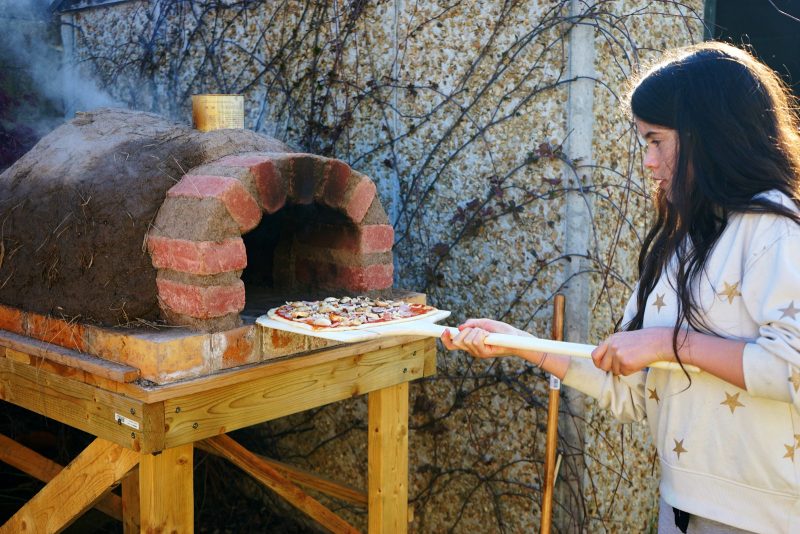
Only the Firehouse Bakery, in Delgany, were launching their DIY pizza box – a €25 kit comprising 4 sourdough pizza dough balls, tomato sauce, grated mozzarella, salami and chorizo slices, plus a YouTube tutorial on how to shape and bake pizzas. The offer proved too tempting.
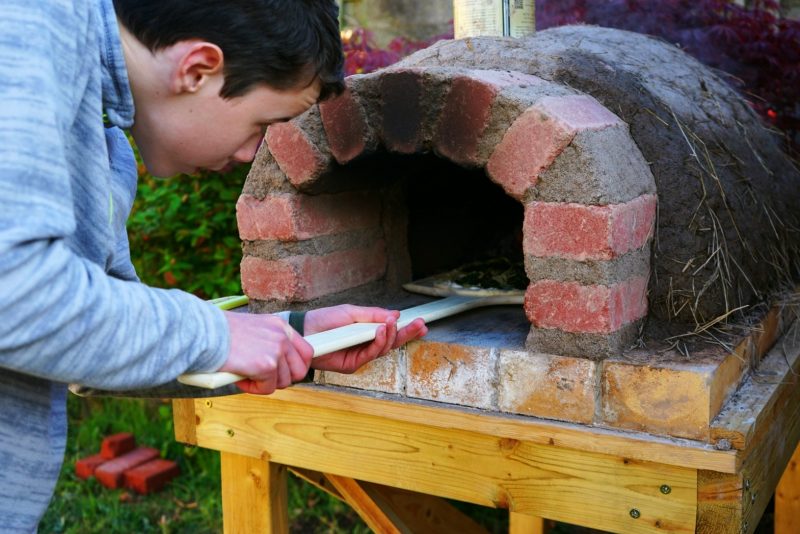
After walking to the Firehouse to collect our pizza box, we fired the oven to dry it. It wasn’t long before Brian decided to go for it and cook the pizzas in it.
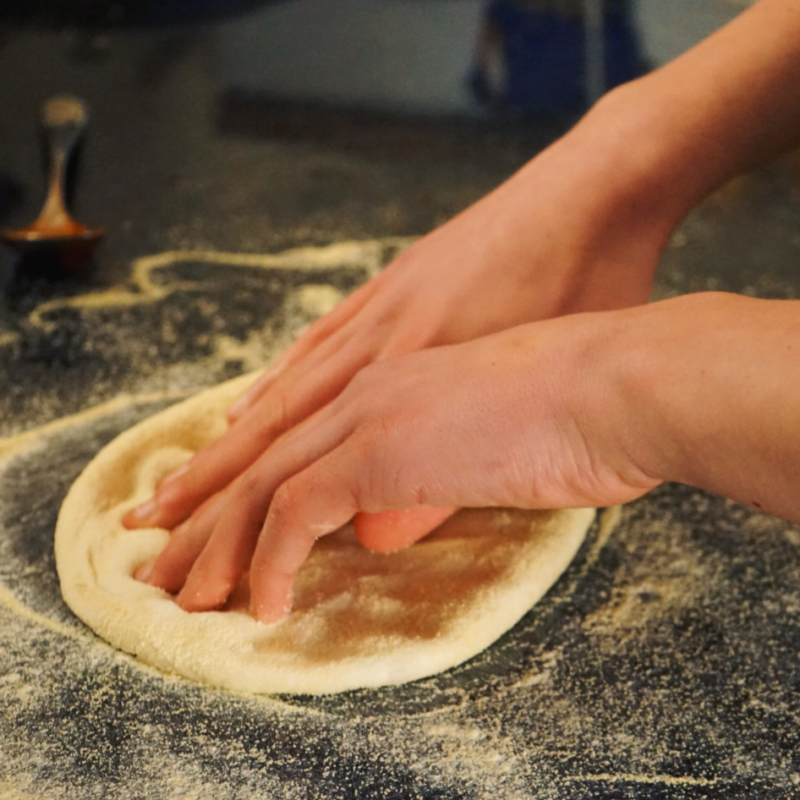
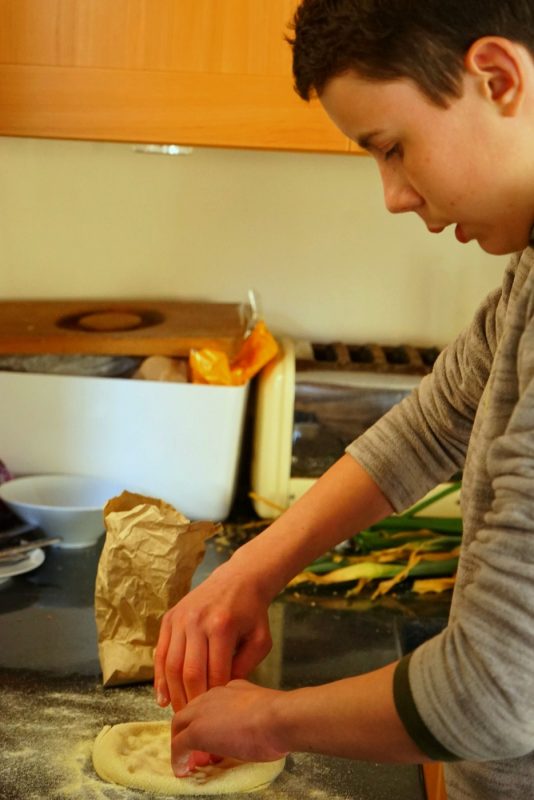
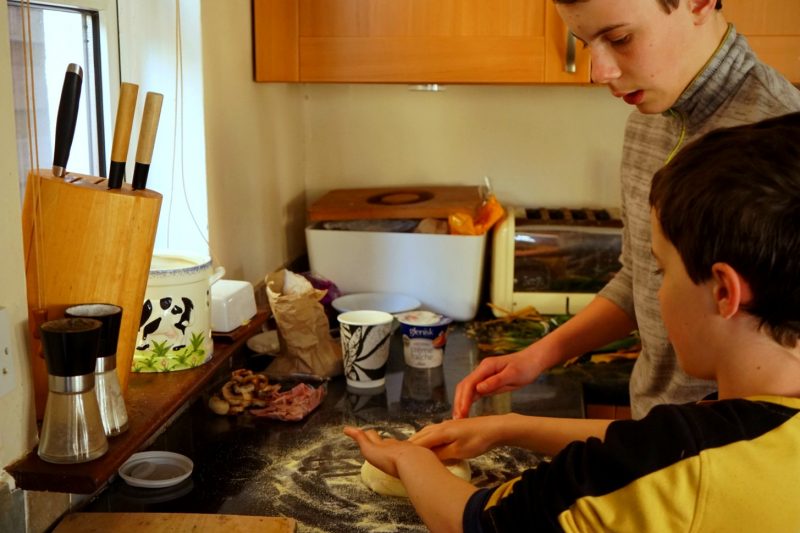
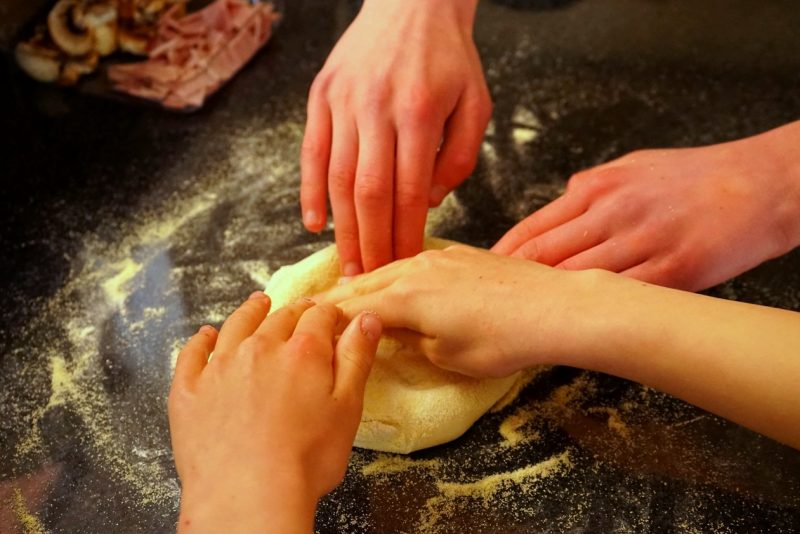
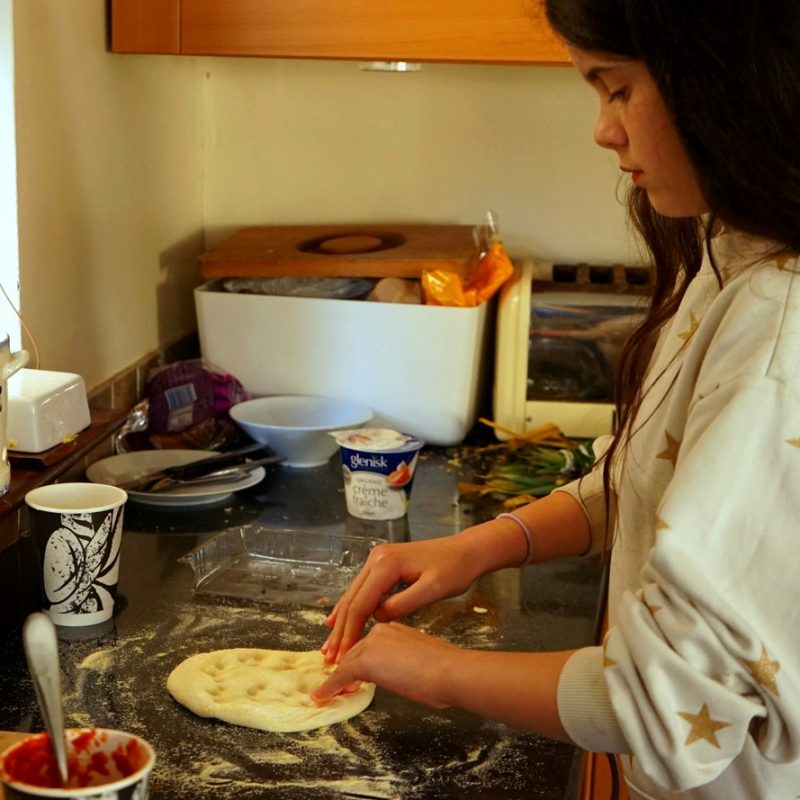
Soon, making and baking the pizzas became a family endeavour, much like building the clay oven itself.
Mais voilà, la boulangerie Firehouse, à Delgany, proposait pour la première fois un kit à pizza, comprenant 4 boules de pâte à pizza, de la sauce tomate, de la mozzarella râpée, des tranches de saucisson et chorizo, ainsi qu’une page d’indications pour l’utilisation du kit. Nous nous sommes laissés tenter.
Après être allés à pied à la boulangerie pour récupérer notre kit à pizza, nous avons allumé le four pour le sécher. Brian ne tarda pas à décider de l’utiliser pour cuire nos pizzas.
Bientôt, faire et cuire les pizzas devint une affaire de famille, exactement comme la construction du four.
Sourdough pizza dough from the Firehouse /
Boule de pâte à pizza de la boulangerie Firehouse.
Pizza margherita
Ham & mushrooms pizza /
Pizza jambon & champignons
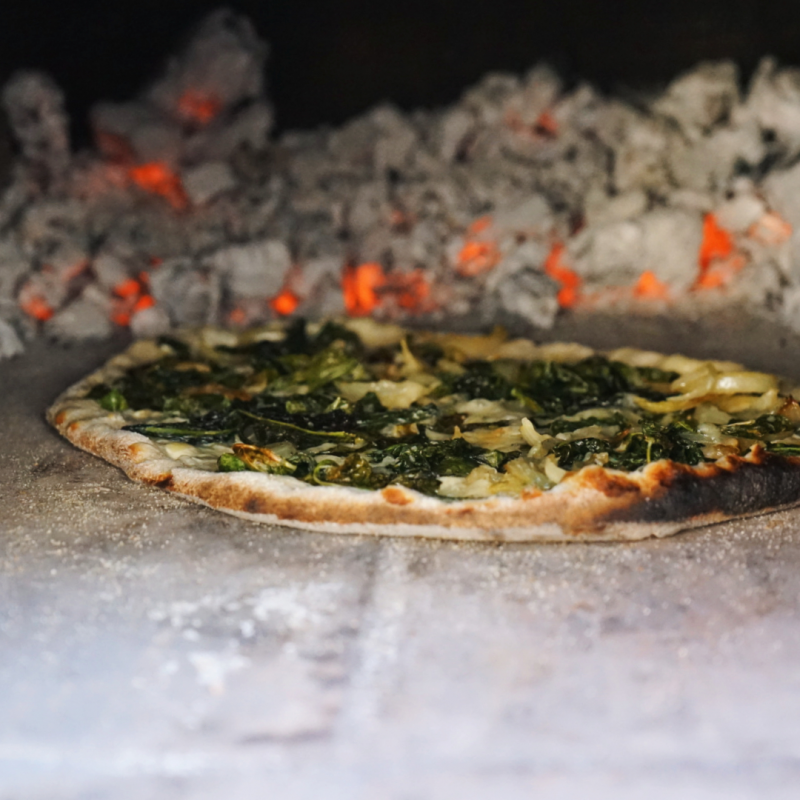
Kale & onion pizza – a firm favourite /
Pizza onion & chou kale, une de nos préférées.
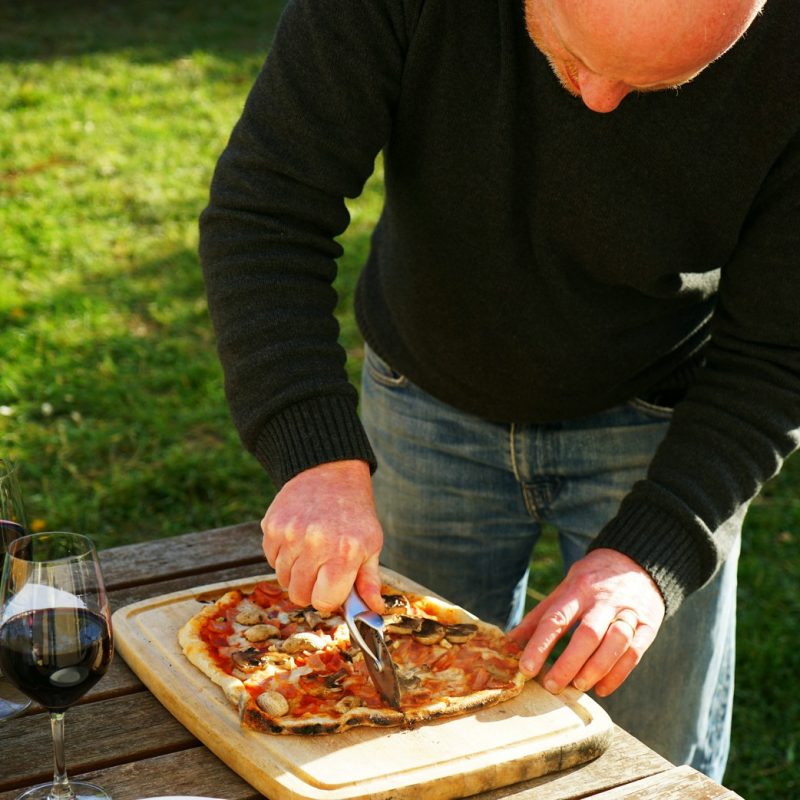
Is there any better way to spend a Sunday afternoon than eating wood-fired homemade pizza outside in the sunshine?! I don’t think so!
Y a-t-il meilleure façon de passer un dimanche après-midi que de déguster des pizzas faites maison sous le soleil printanier ? Je ne crois pas !
Related / Similaire
- Winter feast on the beach / Festin d’hiver sur la plage
- Wild camping a little closer to the stars / Camper un peu plus près des étoiles
- Campfire bread on a stick (snobrød) / Pain au feu de camp (snobrød)
- Four Acorns go camping in a tipi / Quatre graines de chêne dans un tipi
- Outdoor pancake party / Crêpes party en plein air
Disclosure: This post contains some affiliate links. Should you choose to make a purchase after clicking on one of them, I may receive a small commission and your purchase will help support this site.
Avertissement : Cet article contient des liens partenaires. Si vous décidez d’effectuer un achat après avoir cliqué sur l’un d’eux, je recevrai une commission qui contribuera à soutenir ce site.


 Previous Post
 Next Post
Dear Annette, there are so many posts out there on www and many just pass by my eyes as I feel tired to read so much but when I heard you are writing about the diy pizza oven, I got interested to wait, stop, read and ENJOY!!! All the photos are so beautiful and every step is explained in a great and short way! Just BEAUTIFUL!!!! Thank you!
Michaela
I love how building the pizza oven was such a family affair with all the acorns joining in to help. What a wonderful experience that was for them. I’m glad you managed to get all the materials you needed before everything shut down and that the second attempt on making the former worked out well. The pizza certainly looks like it turned out well and how lovely to enjoy home-made pizza baked in your own home-made pizza oven out in the garden. Thank you for sharing with #CountryKids
Génial !! C’est le premier mot qui m’est venu lors de la lecture de cet article et du visionnage de la vidéo consacrée à la construction familiale de ce fabuleux four à pizzas. Au-delà du résultat, j’adore l’ambiance à la fois toute simple et hyper fusionnelle qui se dégage de ces moments, oh combien précieux, passés entre vous. Chez nous aussi la période de confinement a été propice à de nombreux moments de partage, cohésion, complicité et reconnexion et le déconfinement apparut presque comme une épreuve…
Régalez-vous bien de pizzas et de ces moments précieux. Bises à toute la tribu.